|

平成25年09月07日〜平成26年03月09日 41件
|
|
FZ-200 のホットシューが空いていて、特にストロボ等のアクセサリを買う予定も無かったので、泡式
の簡易な水準器を買って取り付けてみました。
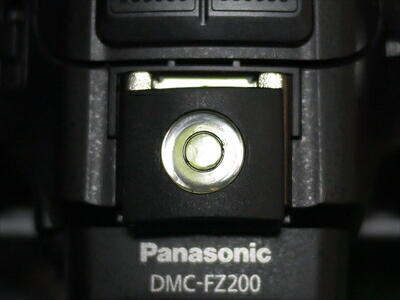
( う〜ん、イマイチ泡が綺麗に撮れないな。)
まぁ、真上から見れば水平なら泡が水準器の真ん中に来るんだが、
これを斜め後ろから見ると
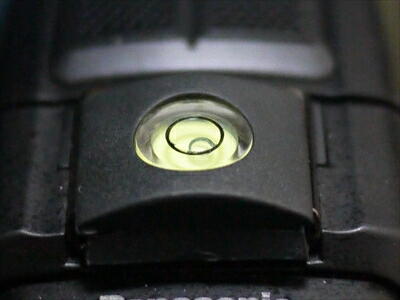
屈折の関係で、泡が後ろに寄っている ( レンズが下を向いている ) ように見えてしまう事が判明。
これじゃイカンということで、LED式の水準器を買い足しました。
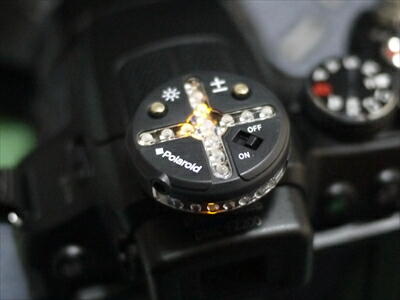
↑傾いていると、このように泡とは逆に傾いた側にLEDが移動するように光り、
水平になると、このように真ん中の緑色のLEDが灯ります。
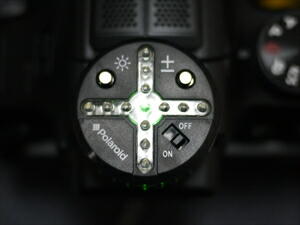 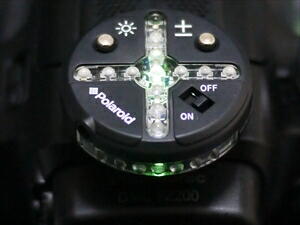
ホットシューに取り付けたままで電池の交換が出来る優れモノ。
同じ商品がブランド名違いで倍額以上のプライスで売られているのが不思議です。
- - 以下、取説の機械翻訳 - - - - - - - - - - - - - - - - - - - - - - - - - - - -
Introduction
The 3-D LED Level comes pre-adjusted from the factory.
It has been calibrated to read level conditions atop your camera tripod.
It reads horizontal levelness left to right and horizontal levelness tilting down and up.
When the green LED in the center of the level lights up alone,your camera platform is horizontal
60° around the tripod.
If any other color LED is lit,the camera platform is not perfectly level.
The level incorporates a side-mounted LED readout making it convenient to read levelness from
behind the camera when the tripod platform is tilted up from its
Landscape position to put the camera in the portrait position.
See item (6) in the side view above.
イントロダクション
3D LEDレベルはあらかじめ調節されて、工場から来ます。
それはあなたのカメラ三脚の上の読み取りレベル条件に測定されました。
それは、右に残された水平の水平性、および下へ傾く水平の水平性を読みます、そしてを上へ。
レベルの中心にある緑色LEDが単独でつく場合、あなたのカメラ台は三脚のまわりの水平の360°
です。
他の色LEDがつけられる場合、カメラ台は完全にレベルではありません。
レベルは、三脚のプラットフォームが肖像立場にカメラを置く、
その景観位置から上昇して傾けられる場合に、カメラの背後から水平性を読むことを
便利にする側をマウントされたLED読み出しを組込みます。
上記の側面図でアイテム(6)を参照してください。
Using the Factory Settings.
1 Setup your tripod adjusting the camera platform close to level.
2 Turn on the 3-D LED Level by sliding the Power Switch to the“ON”position.
3 Place the3-D LED Level on the camera platform.
4 Adjust the tripod legs until the center LED(green) lights up and the six other LEDs
of the Left-to-Right Tilt Indicator are off..
5 Loosen the tripod handle to aiiow the tripod head to tilt up and dpwn.
6 Adjust the tilt handle until the and the center LED (green) lights and the six other LEDs
of the Front-to-Back Tilt Indicater are off.
7 Tighten the tilt control.
8 Attach the3-D LED Level to your camera by sliding it into the camera's hot−shoe mount
with the Power Switch closest to the rear of the camera.
9 Look through the viewfinder (or display screen) to verify that the horizon line in the distance
is levl.
If so,you can use the factory settings to verify that the 3-D LED Level will help you keep
your camera shots level.
If not,follow the steps in the next section.
出荷時設定の使用。
1 セットアップ、レベルに近いカメラ台を調節するあなたの三脚。
2 「ON」位置への電源スイッチを滑らせることにより3D LEDレベルをつけてください。
3 カメラ台にthe3-D LEDレベルを置いてください。
4 中心LED(緑)がつき、左から右の傾斜インディケーターの6つの他のLEDがオフであるまで、
三脚の脚を調節してください..
5 三脚のハンドルを緩める、に、傾く三脚の頭およびdpwnをaiiowします。
6 チルト・ハンドルを調節する、まで、また、中心LED(緑)明かりおよび支持する
フロント傾斜Indicaterの6つの他のLEDはオフです。
7 傾斜コントロールを強化してください。
8 カメラのカメラの後部に近い電源スイッチを備えたhot?shoeマウントに
それを滑り込ませることにより、カメラにthe3-D LEDレベルを付けてください。
9 地平線が遠方にlevlであることを確認するためにファインダー(あるいは表示画面)に
目を通してください。
そうならば、3D LEDレベルが、あなたがカメラ画像レベルを維持するのを助けるだろう
ということを確認するために出荷時設定を使用することができます。
そうでなければ、次のセクションのステップに従ってください。
Initializing Zero Points
1 Initializing zero points aligns the vertical and horizontal lines shown in your camera's viewfinder
with the corresponding indicators on the 3-D LED Level.
2 Slide the 3-D Level into the camera's hot shoe and attach the camera to the tripod.
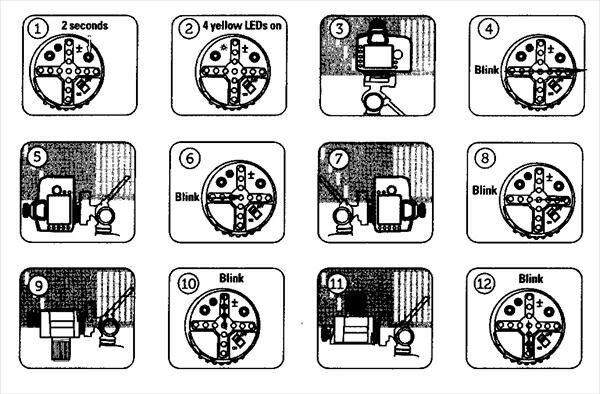
3 To enter the level's initializing mode,press and hold the Sensitivity Button for 2-seconds
.( See figure 1.)
4 Four yellow LEDs will light ( See figure 2.)
5 Look into the camera viewfinder and adjust the tilt angle of the tripod head
and the tripod's horizontal adjustment until the camera aligns
with the horizontal and vertical references in the viewfinder.
6 Lock the tripod adjustments.
7 Press the Sensitivity Button quickly.
Two yellow LEDs in the horizontal direction will turn on,and the seven horizontal LEDs
will blink sequentially. ( See figure 4.)
This step completes the horizontal initializing.
8 Tilt the camera down and to the left by 90° to initialize the left vertical direction.
( See figure 5.)
9 Look into the camera's viewfinder and again align the horizontal and vertical refence objects
so they appear parallel to the horizontal and vertical viewing limits of the viewfinder.
10 Lock the tripod adjustments and,once again,press the Sensitivity Button quickly.
Two yellow LEDs in the horizontal direction will light followed by the blinking of the four LEDs
on the side of the Left-to-Right Tilt Indicator. ( see figure 6.)
11 Tilt the camera down 90° to the right to initialize the right vertical direction.
( See figure 7.)
12 Look into the camera's viewfinder and again align the horizontal and vertical reference objects
so they appear parallel to the horizontal and vertical viewing limits of the viewfinder.
13 Lock the tripod adjustments and,once again,press the Sensitivity Button quickly.
Two yellow LEDs in the horizontal direction will light followed by the blinking of the four LEDs
on the right side of the Left-to-Right Tilt Indicator. ( See figure 8.)
ゼロ点の初期化
1 ゼロ点の初期化は、3D LEDレベルで
あなたのカメラの対応する指標を備えたファインダーの中で示される
垂直・水平のラインを整列させる。
2 カメラのホット・シューに3Dレベルを滑り込ませて、三脚にカメラを付けてください。
3 レベルの初期化するモードを入力するためには、2秒間感度ボタンを押して保持してください
( 図1を参照。)。
4 4つの黄色のLEDがつくだろう(図2を参照。)。
5 カメラ・ファインダーを調査して、カメラがファインダー中の水平・垂直の参照と提携するまで、
三脚の頭および三脚の水平の調節の傾斜角を調節してください。
6 三脚の調節をロックしてください。
7 感度ボタンを速くプレスしてください。
左右方向での黄色の2つのLEDがつけるでしょう。
また、7つの水平のLEDは連続して明滅するでしょう。
( 図4を参照。)
このステップは水平の初期化を終えます。
8 左の垂直方向を初期化するために90°によって左を下って、
およびその左にカメラを傾けてください。
( 図5を参照。)
9 カメラのファインダーを調査して、
それらがファインダーの水平・垂直の見る範囲と平行に見えるように、
再び水平・垂直の再フェンス・オブジェクトを整列させてください。
10 三脚の調節をロックして、もう一度、感度ボタンを速く押してください。
左右方向での黄色の2つのLEDが、左から右の傾斜インディケーターの横の
4つのLEDの明滅を後に続けてつくでしょう。
( 図6を参照。)
11 正しい垂直方向を初期化する権利への90°を下ってカメラを傾けてください。
( 図7を参照。)
12 カメラのファインダーを調査して、それらがファインダーの水平・垂直の見る範囲と
平行に見えるように、再び水平・垂直の参照物体を整列させてください。
13 三脚の調節をロックして、もう一度、感度ボタンを速く押してください。
左右方向での黄色の2つのLEDが、左から右の傾斜インディケーターの右側の4つのLEDの
明滅を後に続けてつくでしょう。
( 図8を参照。)
 |
|
|
|


